
The whole point of a post construction cleaning checklist is to deal with the one thing renovations leave behind that a normal tidy-up never touches: fine construction dust. It settles into every vent, every light fixture, and every windowsill, and it keeps resettling for days. Work top to bottom, dry before wet, and finish with the air itself, and a freshly built space actually feels finished. If you would rather hand the whole job to a crew, our after construction cleaning service in the GTA handles it from the ceiling down.
This guide gives you the room-by-room checklist a professional crew follows, plus the order that keeps you from cleaning the same surface twice. Print it, tape it to the wall, and tick boxes as you go.
In this article
Why This Type of Cleaning is Different
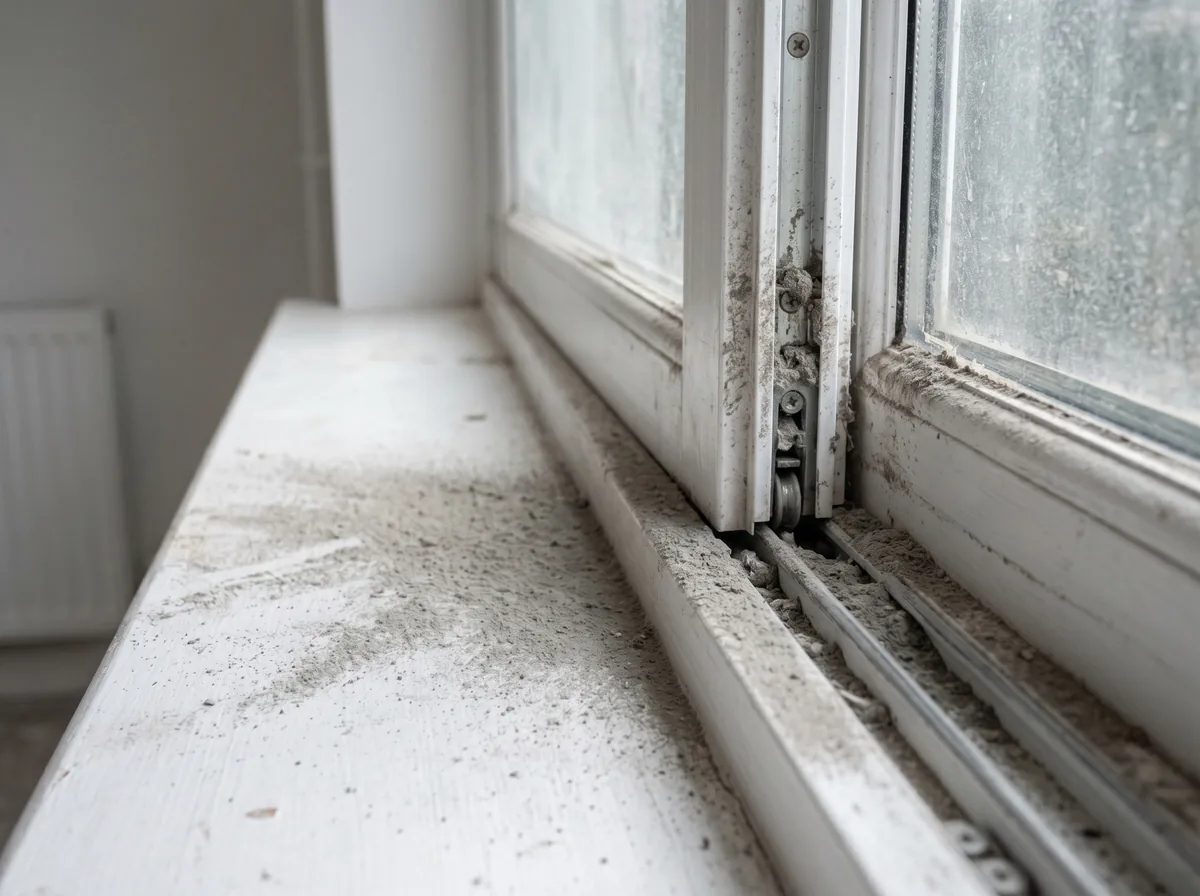
Renovation dust is not like everyday household dust. Drywall sanding, sawing, and grinding throw off an ultra-fine powder that hangs in the air for hours and then drops onto every horizontal surface, including the tops of door frames and the inside of cabinets you have not opened yet. A regular vacuum and a quick wipe just push it around. You have to capture it, not spread it.
There is also debris a normal clean never sees: paint flecks, caulk smears, adhesive labels on new windows and appliances, grout haze on fresh tile, and the odd stray nail or screw. Each of those needs the right approach so you do not scratch a brand new surface trying to clean it.
Before you Start: Gear and Safety
Please note: The tips here are for general guidance only. CleanMol is not responsible for any damage, injury, or cost resulting from action taken based on this content. Cleaning products can harm surfaces or your health if misused, so always read the label, never mix products (mixing bleach with other cleaners can release toxic gas), test in a hidden spot first, and ventilate the room. For product-safety information, see Health Canada on using household chemicals safely.
Construction dust is an irritant, so protect yourself first. A snug N95 mask, safety glasses, and gloves are the bare minimum, and you want windows open and a fan running for cross-ventilation. The fine particles this kind of cleanup stirs up are exactly what indoor-air guidance from Health Canada on indoor air contaminants warns about, so ventilation is not optional.
A realistic kit for a post-build clean looks like this:
- A shop vacuum with a HEPA filter. A regular vacuum blows fine dust straight back out the exhaust.
- Microfibre cloths, lots of them. They trap dust instead of smearing it. Plan to swap them often.
- Microfibre flat mop and two buckets. One for clean water, one for rinse, so you are not mopping with mud.
- A plastic putty knife or razor scraper. For paint flecks and stickers, used at an angle so it never gouges glass.
- pH-neutral cleaner and glass cleaner. Skip anything harsh on new finishes until you know the surface.
Read the label before you mix anything! Never combine cleaning products to “make it stronger.” Mixing bleach with an acid or ammonia-based cleaner can release toxic gas. Use one product at a time, follow the label, and if you are unsure about a chemical, check Health Canada guidance on using household chemicals safely before you reach for it.
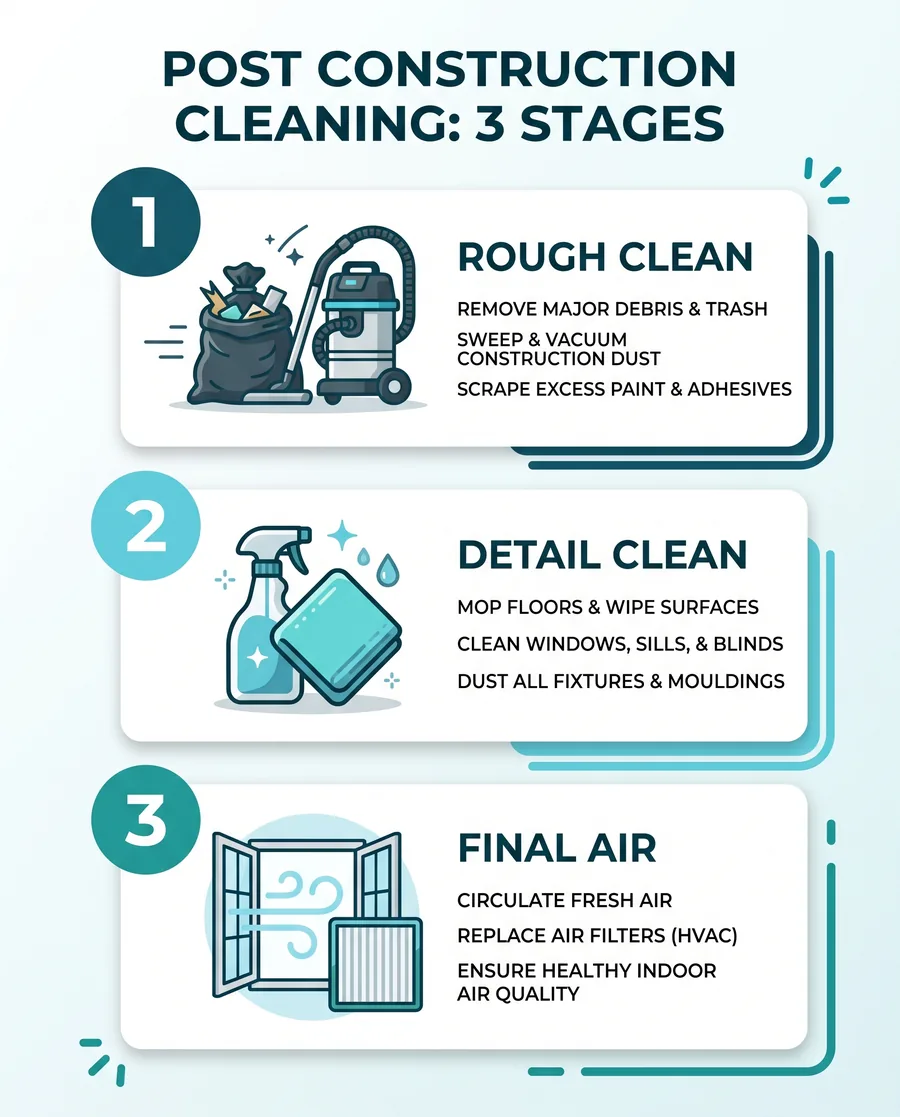
Stage 1: The Rough Clean
The rough clean clears the big stuff so the detail clean is not fighting through clutter. This is the order a crew runs it, and the order matters because each step keeps the next one from getting re-dirtied.
- Remove all debris and trash. Offcuts, packaging, empty tubes, drop sheets. Bag it and get it out of the space.
- Pull stickers and labels. Windows, appliances, fixtures, and faucets all ship with them. A little heat from a hair dryer helps the adhesive let go.
- Dry-dust from the top down. Ceilings, light fixtures, fan blades, then walls, then trim. Gravity is doing half the work, so do not fight it.
- Vacuum everything with the HEPA shop vac. Vents, baseboards, window tracks, inside cabinets and closets, then the floors last.
People often ask: how long after construction should I wait to clean?
Give the trades a clear day if you can. Dust thrown up during the final sanding and trim work needs time to settle before a deep clean is worth doing, otherwise you will be cleaning the same surfaces twice. Most GTA crews schedule the post-build clean once all the messy work is fully done and the site is empty, then return for a quick touch-up after the furniture moves in.
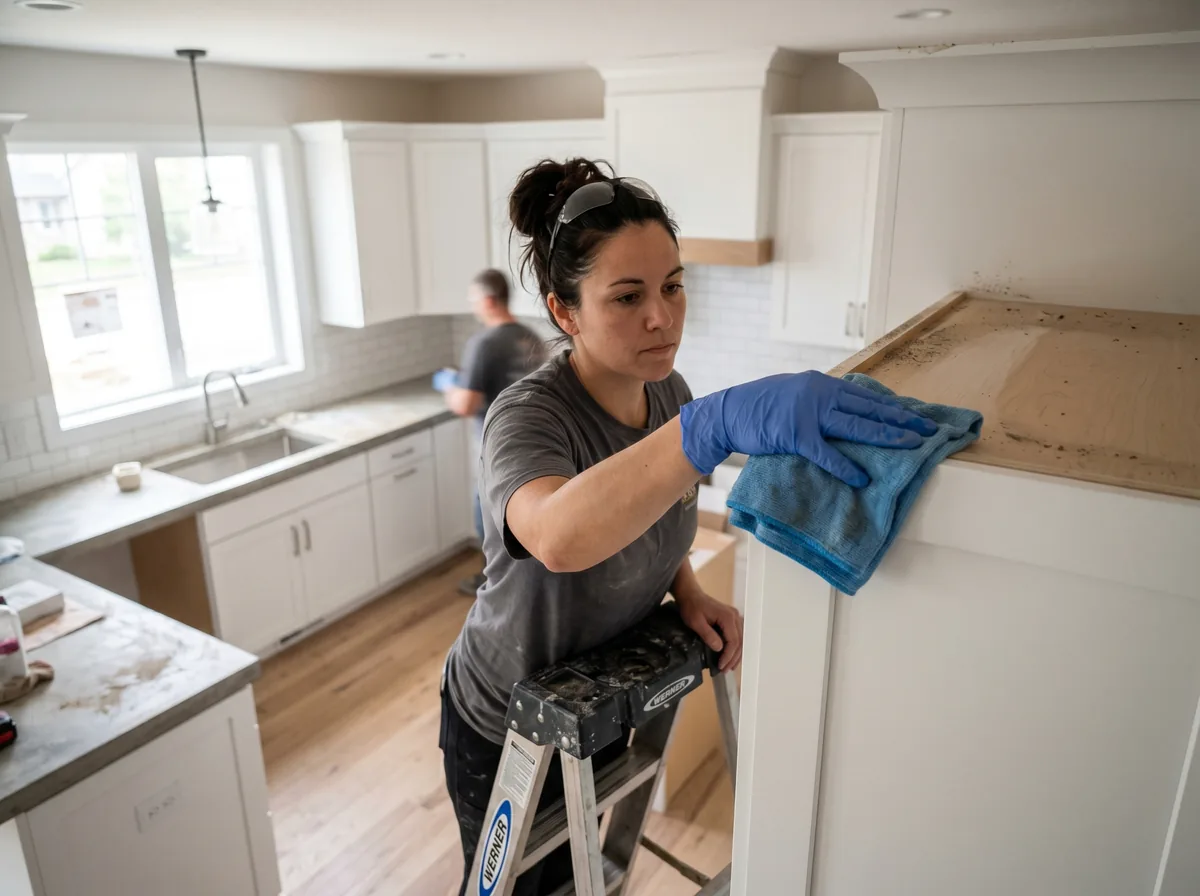
Stage 2: The Detail Clean From Top to Bottom
Now the real work. Same principle as the rough clean: start high, end low, and do wet cleaning only after the dust is captured. Go room by room so nothing gets skipped.
Kitchen and bathrooms
- Wipe inside and outside of every cabinet and drawer, including the tops.
- Clean grout haze off new tile with the product the tile maker recommends, never a random acid.
- Polish faucets, sinks, and counters, then run a clean cloth over backsplashes.
- Wipe down new appliances inside and out, and pull off any remaining film.
Living spaces and bedrooms
- Damp-wipe walls if the paint is cured, testing a hidden corner first.
- Clean window glass, frames, and tracks; vacuum the track before you wash it.
- Wipe doors, handles, switch plates, and outlet covers, which collect surprising amounts of dust.
- Vacuum then mop hard floors; vacuum carpet slowly in two directions.
Pro tip: Change your water more often than feels necessary. Construction residue turns mop water grey fast, and dirty water just redeposits a film that dries to a haze. A good rule is fresh water for every room, sometimes twice in a big kitchen. It feels wasteful, but it is the difference between floors that look clean and floors that actually are. The two-bucket method, one wash and one rinse, makes this easy to keep up.
Stage 3: The Final Touch-up and Air
The last stage is the one most people skip, and it is why a space can look clean but still feel dusty a week later. Fine particles you stirred up during cleaning are still floating, and they will land on your freshly cleaned surfaces overnight.
- Change or clean the furnace filter. The HVAC system pulled construction dust through the whole house. A fresh filter stops it recirculating.
- Run an air purifier or keep cross-ventilation going. A day of moving air clears the last of the airborne dust.
- Do a final pass on glass and mirrors. These show settled dust first, so save them for last.
- Walk the space in daylight. Raking light from a window reveals streaks and missed spots nothing else will.
Common Mistakes That Ruin the Result
- Cleaning bottom to top. Dust falls. If you mop before you dust the ceiling fan, you mop twice.
- Using a regular vacuum. Without a HEPA filter you are blowing the finest, most irritating dust back into the room.
- Scrubbing new surfaces with the wrong product. Acidic cleaners can etch new stone, and abrasive pads scratch glass and stainless. Test first.
- Forgetting the air and the filter. Skip the final ventilation step and the dust you stirred up just resettles.
- Reusing dirty water and cloths. A grey mop or a saturated cloth smears a film that dries to a haze.
Sources and further reading
- Health Canada – Use household chemicals safely.
- Health Canada – Indoor air contaminants.
- Public Health Ontario – environmental and indoor health resources.
- CleanMol, in-house post-construction cleaning practice and 2026 GTA pricing observations.
Frequently asked questions
What is included in a post construction cleaning checklist?
A complete post construction cleaning checklist runs in three stages. The rough clean removes debris, stickers, and the worst of the dust by vacuuming top to bottom. The detail clean goes room by room, wiping cabinets, glass, fixtures, and floors with the right products for each new surface. The final stage handles the air itself: changing the furnace filter, ventilating, and doing a last pass on glass and mirrors. Working high to low and dry before wet is what keeps you from cleaning the same surface twice.
How is post construction cleaning different from regular cleaning?
Regular cleaning maintains an already-clean home, while post construction cleaning removes the fine, sticky dust and debris a renovation leaves behind. That dust settles into vents, light fixtures, cabinet tops, and window tracks, and it keeps resettling for days. It also calls for special gear like a HEPA shop vacuum and the right products for brand new surfaces. A normal vacuum and a quick wipe will not capture construction dust; they just spread it around the room.
How long does post construction cleaning take?
Time on site depends on the size of the space and how much dust the work left behind. A single renovated room often takes two to four hours, a condo renovation runs about half a day, and a whole-home build can take one to two full days, sometimes with two cleaners. Heavy drywall sanding and lots of new tile add time because grout haze and fine powder are slow to deal with properly. A walkthrough gives a far more accurate estimate than a photo.
Can I do post construction cleaning myself or should I hire a pro?
You can absolutely tackle a small renovation cleanup yourself with a HEPA shop vacuum, plenty of microfibre cloths, and the checklist in this guide. For a whole-home build or a job with a lot of grout haze, stainless appliances, or fragile new finishes, a professional crew saves time and avoids costly mistakes like scratching new surfaces. Pros also have commercial equipment that captures fine dust far better than household gear. If you are short on time or unsure about a surface, hiring out is the safer call.
Your next steps
A post-build clean is not harder than a regular one, it just follows a stricter order. Capture the dust before you spread it, work from the ceiling to the floor, and finish with the air.
- Gear up: HEPA shop vac, microfibre, two buckets, a plastic scraper, and an N95 mask.
- Work the three stages in order: rough clean, detail clean, final air.
- Change the furnace filter and ventilate so the last of the dust does not resettle.
Download the free quick guide
Take our printable three-stage checklist room by room so you never miss a spot after a renovation.
Just finished a renovation in the GTA?
Let CleanMol handle the dust so you can enjoy the new space. Book our after construction cleaning service, explore our full residential cleaning options, or get a free quote for your space. Moving in too? Ask about move-in and move-out cleaning.

Written by
Naomi C.
Home Organization & Lifestyle Specialist
Naomi specializes in creating sustainable organization and cleaning systems for households across the GTA. She provides practical insights into decluttering and efficient household management.